27 April 2012

An Ode to A Bowl... for simple side dishes


Dear Friends,

     Did you ever lose something special and just when you thought it disappeared forever you find it? Well, that is what happened this week to me. I could not find a bowl that my mom had given me years ago.  It is the prettiest one I own and I use it all the time for holiday dinners or to put my food in for potluck meals with friends. What I learned is to start looking in the most obvious places first. This is what inspired me to write this poem. Enjoy!! And enjoy the recipes that follow of some of the simple side dishes that this bowl held.


An Ode to A Bowl

I had a bowl, a special bowl
A bowl beyond compare.
But then one day I looked for it
And my bowl it wasn’t there

Oh where oh where could it have gone
How could it disappear?
Think think think, I told myself
I know it must be here.

I pulled apart the cupboards
I searched both high and low
And shook my head and stretched my brain
Wondering, where did my bowl go?

I missed the etching on the side
With the initials L.L.G
But most of all I missed the bowl
Because my mom gave it to me

I thought that I would ask my friends
Did you see my bowl? I whined.
I thought perhaps I left it here
The evening that we dined.

No one knew just where it went
But consoled me for my loss
That night I slipped into my bed
And did nothing but turn and toss

Then it hit me like a spark
As I stumbled in the night
That bowl of soup I made last week
That vegetable delight

 I stored that soup in my bowl
I was sure that’s what I did
I know now where to find my bowl
I know where it had hid

 I raced straight to the kitchen
Flung open the fridge door
And hiding behind the jars of food
Was my loving bowl once more

Now the moral to this story
The one I have to say
That this is a clear message
To clean my fridge today

corn corn and more corn
This absolutely addicting side dish is made only by tossing the corn with a bit of EVOO, adding salt and pepper and red hot pepper flakes, sauteing it until the edges turn brown and all liquid disappears and then adding a bit of butter. Stir the corn regularly while it is cooking. All I can say is make more than you think you will eat because I guarantee you will eat it all. 

Kale Salad
This salad is a hit at any potluck dinner. And it looks great in my bowl. I am linking right to Meghan's blog post for the recipe. It is easy, healthy, and everyone loves it. 


Zucchini and Mushrooms
The secret to this perfect simple pleasure is lots of different types of mushrooms. That's it. Slice the squash, mix in the mushrooms, add a bit of S and P mix with EVOO and it's done. Saute on med high heat.
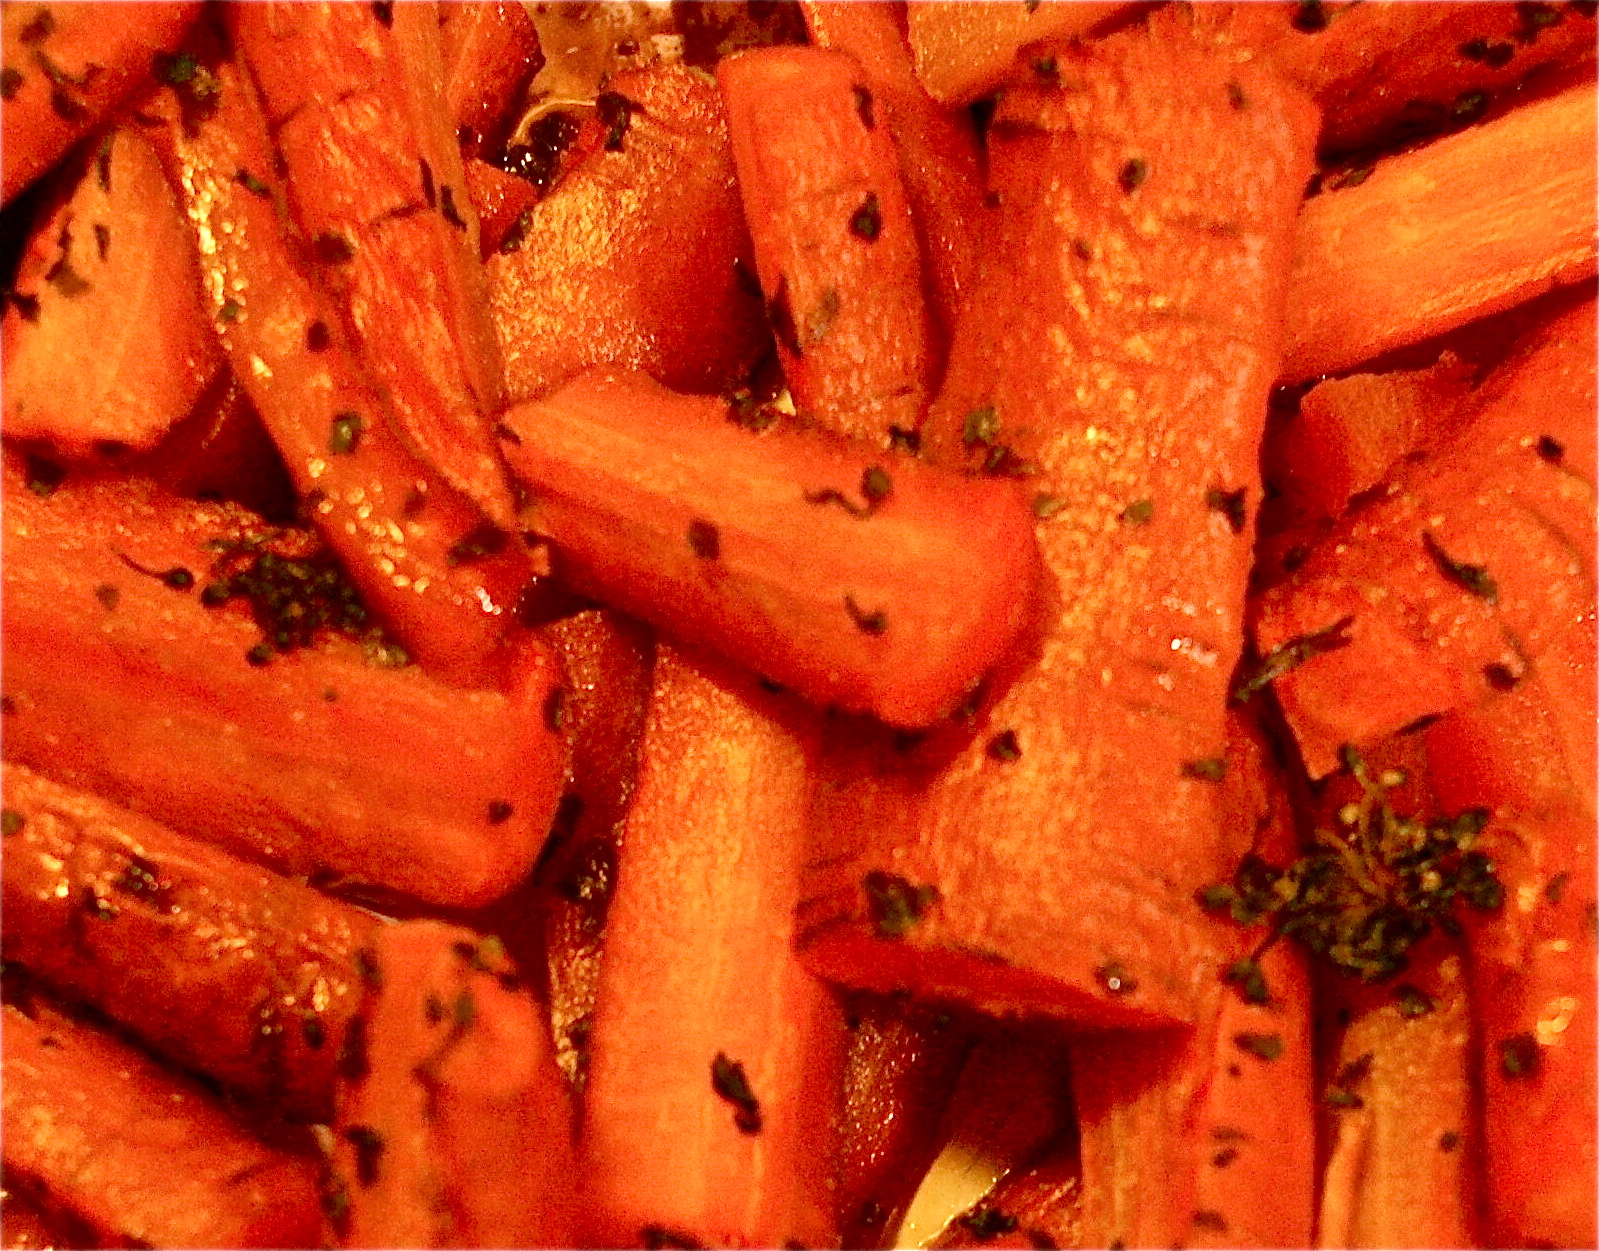
Cut up Carrots

Not much to do here but slice, mix in some EVOO and add some thyme and marjoram, toss with some pure maple syrup ( about a tbs of grade A dark works best to every five carrots) and bake in a high heat 425 degree oven until they brown slightly, say about twenty-five minutes.  These add lots of color to the plate and also make a wonderful snack food the next day so remember that when figuring how much to make. 


Pretty Pesto

For this just check out this link of I LOVE PESTO for recipe. http://www.divvyupdining.blogspot.com/2012/04/i-like-no-love-pesto.html

So if you do not have a favorite bowl, find one. It will give you great joy. 


RSVP

jude
.


25 April 2012

Stewed Rhubarb and Rope Swings

We had my brother-in-law, his wife, and a good friend in town this weekend.  The weather was epic - 80 degrees and super sunny.  Noah and I played hooky from work on Friday (actually we both took vacation days but it felt like we were playing hooky) and headed to Bass Lake, a pristine, fresh water lake in the southern part of Pt. Reyes.  We hiked in, jumped off the rope swing, splashed around in the lake for an hour, and then lounged in the sunshine.  It was just like being a kid again and enjoying the endless days of summer.


On the way home I was excited to see some fresh rhubarb at a farm stand in Marin.  Rhubarb is an interesting plant.  It's a vegetable that originated in Asia and is quite nutritious.  Fun facts about rhubarb:  Its leaves (not the edible stems) can be poisonous if consumed in large quantities or if distilled to make a poison.  It is also allegedly a laxative, although I don't recall anyone ever commenting on this side effect. 


Until a few years ago, my primary experience with rhubarb had been as a dessert – strawberry rhubarb pie, strawberry rhubarb crisp, rhubarb pie.  That changed when a friend gave me a recipe for stewed rhubarb, along with the idea of putting it on yoghurt for breakfast.  I've also been making homemade muesli (which will probably be the subject of a future post as I'm obsessed) and this was the perfect addition.  


Ingredients
2 big stalks of rhubarb (about 18 inches)
1/4 maple syrup (or substitute brown sugar if you don't have maple syrup.  Honey may impart a funny flavor but feel free to give it a try)
1 tsp vanilla
  1. Dice the rhubarb into 1/4-1/2 inch slices.
  2. Add a 1/3 cup of water to the pot, the maple syrup, and vanilla.  Cover and cook on medium heat.
  3. Once water begins to boil, remove cover.  Rhubarb already contains a lot of water, and you want to end up with a thick, not watery topping.
  4. Cook until the rhubarb is soft and begins to fall apart.  If you like the chunks, you can cook it less but you may find that it's much more bitter that way.


Swirl it into yoghurt and muesli, eat it alone (delicious), or I bet it would even be good on bread or muffins. 

24 April 2012

Homemade Ricotta

Church of Christ in Norfolk has been offering cooking classes for the past couple of years. Each class has a theme and is taught in a different style. Pasta making, holiday hors'doeuvres, cooking with maple syrup, vegetarian cuisine, a Lebanese meal, sushi making and cooking with Guinness are only a few of the classes that have been shared with the community. Each offering is unique, we've had sit down dinners, demonstrations and hands on learning experiences. Each participant leaves with new recipes and a full belly. It is truly a divvied up dinning experience. People from a 30 mile radius come together one evening a month to learn from someone who is willing to share their passions for food.

Last week Heather Tirrell Adams lead a class titled "Homemade Ricotta 3 Ways." Heather is a Boston University trained chef who is living in Cambridge Ma, she worked for Hungry Mother and has published recipes. It was exciting to be taught by a trained, innovative and enthusiastic chef.


Homemade Buttermilk Ricotta

Yields about 2 cups

1 half gallon of whole milk (preferably fresh, organic)
2 cups buttermilk, well shaken
1 cup heavy cream (not whipping cream)

Combine in a large pot. Heat over LOW heat. Using a thermometer heat to 175 degrees, do not let the mixture boil and DO NOT STIR. Once the mixture reaches 175 degrees remove from heat and let sit and cool for at least 2 hours at room temperature.
 
Set a sieve, lined with cheesecloth, over a bowl. Gently scoop the milk curds into the sieve using a slotted spoon. Be sure not to disturb or break up the curds. Gather cheesecloth up around the cheese and fasten with a rubber band. Let it sit and drain in the fridge for 12-24 hours.

Transfer to a container. Cheese will keep for 4-5 days.


I was amazed how Heather transformed the silky smooth, creamy and oh so delicious ricotta into appetizers, salad, entree and dessert.


If you live within driving distance of Norfolk, CT, come and join the fun at the next cooking class- Homemade Ravioli on May 15th at 6:00. We will be learning to make our own raviolis and then sitting down to share a meal.


23 April 2012

Monday


Chicken Salad, Arugula, Roasted Red peppers, Salt + Pepper Chips

That is all I have to say on this drizzly April Monday.

19 April 2012

CAN YOU FEEL IT? IT'S SPRING

How can anyone resist the first blossoms of spring?
I think of the fruit it is to bring
I get fickle and scattered and dizzy with scent
And I know that my time outside is worth spent

Enjoy the photos, friends.  They are magical and the fruit of life.

Pear


peach

cherry

A dish of  them all with a little apple added

RSVP

jude

18 April 2012

Roasted Artichokes

I've always steamed artichokes.  It seemed like the fastest way to cook them, and every time I tried to roast or grill them, they took forever and dried out.  Not only do artichokes have a high work to satisfaction ratio, they take a very long time to cook. And living in San Francisco, there are only about two days a year where we are inspired enough to grill anything in our backyard.  

We did get some sunshine, just in time for the Cherry Blossom festival in Japantown this weekend.


Team Mead-Long, aprons on, hard at work in the kitchen.
I went out to eat a month ago though, and ordered roasted artichokes with aioli dipping sauce as an appetizer.  It was divine.  I lost interest in the conversation for about 20 minutes, as I polished it off.  While I haven't gotten around to making the aioli (which by the way, is basically mayonnaise with garlic for the uninitiated) to accompany the artichokes, I did start searching for a good roasted artichoke recipe.  After comparing different suggestions, I've settled on the following approach:

Ingredients:
2 artichokes
EVOO (extra virgin olive oil)
1 lemon
4 heads of garlic
Course sea salt
Pepper
  1. Preheat the oven to 400.
  2. Trim the artichokes.  Cut off the bottom part of the stem, and about the top 1/4 (which is inedible) of the artichoke. 
  3. You will want to wrap each artichoke in aluminim foil and may want to prepare it over the foil, so you don't lose a lot of the toppings.
  4. Cover each artichoke in about 1 TBL of EVOO.  Make sure to get it between the leaves of the artichoke.  
  5. Peel the garlic and slice each piece in half.  Insert the four pieces into the artichoke.
  6. Cover the artichoke in lemon juice from half a lemon.
  7. Sprinkle with salt and pepper, wrap in the aluminim foil, and cook for about an hour and fifteen minutes.
With this recipe, you really don't need a sauce but I will probably try it with aioli at some over the next couple of weeks.  Because why not.

16 April 2012

Tree of Life

I'm back.

After a week of immersing myself in other passions (my family and reading-a book much to embarrassing to admit to have read, hint: the title has a number and a color in it), I am ready to divvy up more food ideas. This one comes from my sister Kathy, who's passion for delicious food is infectious. One of the many things that I've learned from her is that presentation counts. When all 5 of our senses are engaged we enjoy an eating experience even more. Kathy always remembers the slices of lemon and the sprigs of herbs that make a dish come alive.

The "Tree of Life" has brought cauliflower to a new level for me. A vegie that I once thought of as kinda boring is now great fun to present to others and so SIMPLE to make.

Here is what you need:
  • an oven set to 400
  • a foil covered cookie sheet (only for ease of clean up)
  • a head of cauliflower
  • 4 chopped garlic cloves (more or less depending on your taste)
  • 2-4 TBL olive oil

  • salt and pepper 
All you have to do is:
  • drizzle olive oil over the cookie sheet
  • scatter the sheet with chopped garlic
  • sprinkle it with salt and pepper (I added chopped rosemary and tarragon because I had some on hand)
  • hold the head of cauliflower with its stem on the counter
  • cut 1/2- 3/4 inch slices, as you cut closer to the stem you will find the "Trees of Life"
  • carefully lay all of your pieces on your oiled cookie sheet

  • bake for 20-30 minuets depending on the thickness of your cauliflower
When done:
  • have a serving platter ready
  • using a spatula, carefully lift "Trees" from the pan and flip them over on to your platter
  • PRESTO- beautifully browned cauliflower trees
  • for the full effect, sprinkle with chopped parsley and garnish with sliced lemon
  • enjoy!!!
I look forward to hearing about the delight created when you introduce this simple recipe to family and friends.

Kath, thank you for opening my eyes to this culinary treat and to a countless  number of others-

LWC


Roasted Chicken

A few weeks ago, I was so inspired by the Roasted Chicken featured on A Cup of Jo, I immediately decided I had to make one. I've never roasted a chicken, and to be honest I don't know that much about cooking meat. If you think roasting chickens is a breeze, you're right! And I'd love to hear your recipe. If you think it sounds daunting, please continue. This recipe made it seem so simple but I did make a few adjustments. The list of ingredients was long, and looked expensive. I mean....it called for culinary lavender, what the hay is that?

My solution was Herbs de Provence, olive oil, and fresh garlic. I used a 2:1 ratio, HdP to olive oil, and smashed a big ole' clove of garlic and let it sit overnight. 


When it was time to roast this baby up, I removed the giblets (I acted really brave while doing it) and washed, then patted the bird dry. I then took about two tablespoons of room temperature butter and massaged it between the skin and the breast meat.


Inside the cavity, I placed half a lemon, half an orange and some fresh tarragon and thyme. I was hoping that once in the oven, the butter under the skin would trickle down and the aroma of the citrus and herbs would permeate upwards and a beautiful, delicious thing would result somewhere in the middle.


I poured the herb oil over the chicken and rubbed it into every crevice on that bird.


To finish off, I cracked some fresh black pepper, and studded the skin with coarse sea salt. There is a lot of talk about trussing- I never get it. I just tied the legs together with kitchen twine, as well as the wings. It cooked away in a hot oven (450) for about an hour.


This was after about 45 mins, by the time it was fully done, everyone was so hungry I didn't get a chance to snap a picture. Make sure that it reaches 165 degrees when you insert a thermometer into the breast, or that the juices run clear. Pink juice = raw meat, raw meat = salmonella, salmonella= hospital visits, hospital visits = time being wasted that could be spent eating chicken.

I want everyone to make this! It is really so easy- and can be budget friendly. Especially considering it will get you far beyond one meal. Do you have any chicken roasting tips? I would love to hear!

KH

14 April 2012

There's Nothing To Eat


Dear Friends,

I will admit that this is just another way of saying I have nothing in my fridge. Well, nothing is somewhat of an exaggeration but we have all been there and you know what I mean.  I just came home late after work and a meeting and a dog walk so I am really really hungry. I had not a clue what I felt like eating but I knew it had to be quick.  I  started opening drawers, refrigerator and cabinets. I found capellini pasta,  mushrooms, parsley and cilantro.  I spotted some small grape tomatoes on the counter. That's a start I thought. I also knew that I still had garlic and onions on hand in the root cellar.
Better Than Gold
I gathered my ingredients and began washing and chopping. I sauteed my one sliced onion and three cloves of garlic first for a few minutes. Then tossed in 8 oz of sliced mushrooms ( no stems). I let this cook until the mushrooms looked good enough to eat. Then I stirred in the handful of chopped parsley and cilantro. I dropped about a handful or two of the grape tomatoes. on top and waited for them to soften.  Then I gently broke them open by pressing a fork on them. Some I left whole for appeal.
The Zing of Capers


Still I felt something lacking. It needed zing. Again I went to  the fridge and looked on my door for ideas. I noticed the capers and recalled my good friend Eileen adding these to one of her delicious dishes. What the heck I decided, I'll give it a go.  So I poured in a bit of the juice and a tablespoon of capers, WOW! I topped it all with some pepper and a bit of salt.


I cooked the pasta al dente and stirred in a bit of EVOO. Then I mixed the pasta with the above. I tried a forkful and all I can say is this:
AMAZINGLY DELICIOUS

I  ATE  EVERY  SINGLE  BITE OF IT AND LEFT NONE FOR MY HUSBAND.

There I admitted it. It was that delicious, I never even realized how much I ate. I am guilty of gluttony. But I did cook him up some of the frozen shrimp I found stuffed in the back of the freezer with capers and soy sauce and tossed it with some capellini. Between you and me, it was not the same. However, I did promise to make my yummy meal again for him next week, especially since I can't stop talking about what a great dinner I had. Oh and if you can think of a name for this dish, please forward it to comments and I may just use it in my book.

AMAZINGLY DELICIOUS


RSVP

jude


11 April 2012

A Weekend in Rio Linda


The entrance to the vegetable garden
Ornamental rose on the garden gate
Over the weekend I visited some family friends in a small town a few miles north of Sacramento.  They have a beautiful two acres spread, covered in flower and vegetable gardens, trees, twenty chickens, two dogs, and even a some swings, and a hammock.  It impressed upon me how much food you can produce on two acres, especially if you are thoughtful about space and cultivation.  Only a portion of the property was devoted to food production; most was used for a plant and gardening business.  I loved walking through the rows and rows of sprouts for sale– fantasizing about having a garden of my own one day. 

From their gardens they pull a variety of fruits and vegetables – ample amounts to eat, can, preserve, and share with friends and family.  This time of year, the sugar snap peas and fava beans were arriving, and the carrots and winter greens were on their way out.  The garden was humming though, and I could see the tiny fruits already forming on the apricot, peach, and plum trees.
Fava bean plants
These meyer lemons were so good I ate them like oranges.  Odd craving?


I swear – food just tastes better when it’s straight from the garden.  We made a delicious meal of fresh pasta with herbs, white beans and chard, and roasted carrots, fava beans, and snap peas.  Dessert was this divine caramelized upside down cake with the last of 2011’s frozen nectarines.  Really, does it get any better than that?  


I was so distracted by the good food at dinner, I forgot to photograph it.
This picture of leftovers does not do the meal justice.

Nectarine upside down cake - I rushed to call seconds.